After watching many videos online about how to prepare a good brisket, It seemed to me that it is something simple and that there is simply no room for failure. Until I tried to make it myself for the first time and realized that it requires some knowledge and skill.
With many attempts and different preparation methods, I came to interesting findings. Also, I researched a lot on the Internet, where I looked at other people’s experiences.
Here, I want to share all my findings in one place to save you from hours of researching and help you prepare a perfect brisket from your first attempt.
The Quality of The Meat is Important
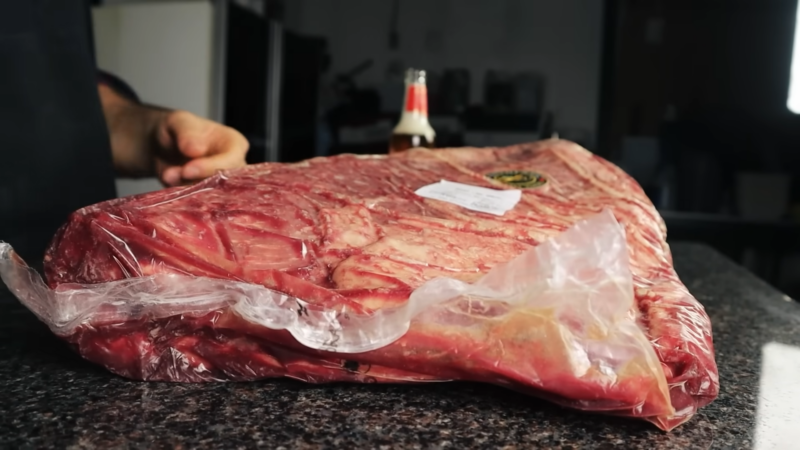
My first finding is that you can be the best cooking expert and grill master, but if you don’t have a quality piece of meat, a lot of your effort goes to waste. Brisket is the main ingredient here and it must be of good quality. The higher the quality of the food, the less trouble you will have to prepare it.
My early attempts involved picking up whatever brisket I found at the local supermarket, not paying much attention to the grade, size, or fat content. Often, these pieces were tough and lacked the juiciness and flavor.
It was a frustrating experience at first because I didn’t know where I was wrong and it demotivated me at the very start. Then, through further research, I discovered that there are three key things to choosing a good chop: grade of meat, size, and fat content, and I will explain why:
Grade of Meat
In the U.S., beef is graded by the Department of Agriculture into several categories, with Prime, Choice, and Select being the most common for consumers. Prime grade, I learned, comes from younger cattle and has the most marbling, which is key to creating a tender, flavorful chop.
Choice grade has less marbling than Prime but can still produce excellent results if cooked properly. Select has the least marbling and tends to be leaner and tougher. I had previously thought “beef is beef,” but understanding these grades helped me realize the impact on the final product’s taste and tenderness.
Size
Another lesson was in the importance of the size and fat content. Early on, I was going for smaller briskets, thinking they would be easier to manage and cook faster. However, I learned that a larger chop, typically between 10 to 14 pounds, is better during the long smoking process, allowing for a more even distribution of heat and flavor.
Fat Content
The fat content was another area where my understanding evolved. Initially, I trimmed off most of the fat, believing it would make the meat healthier, and less chewy. Yet, I discovered that the fat cap, when properly trimmed to about a quarter-inch thick, plays a crucial role in keeping the steaks moist during smoking and adds to the flavor.
Preparation – Mistakes Made, Lessons Learned
When I tried to make my first brisket at the very beginning things got out of control and I realized that I didn’t even know what I was doing. I worked by feeling and not by knowledge or a recipe. I was enthusiastic but very unskilled, leading to a series of comical missteps.
Anyway, when preparing your meat, you should take care of trimming, seasoning, and marinating the meat. I will explain to you exactly what to do and what to avoid when preparing your meat:
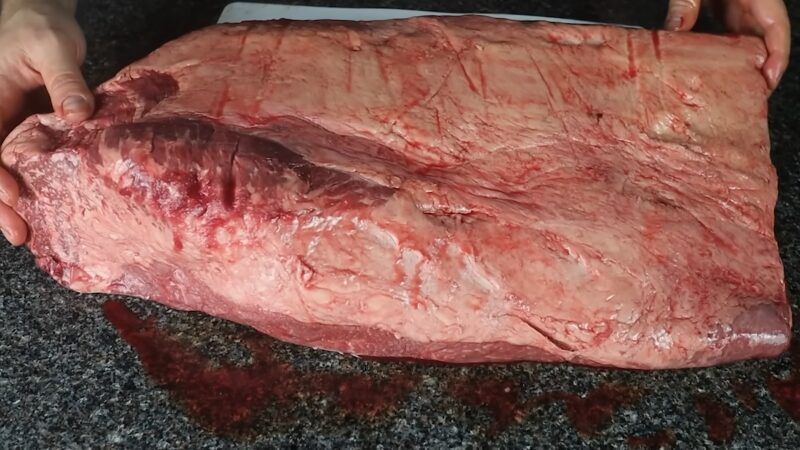
Trimming
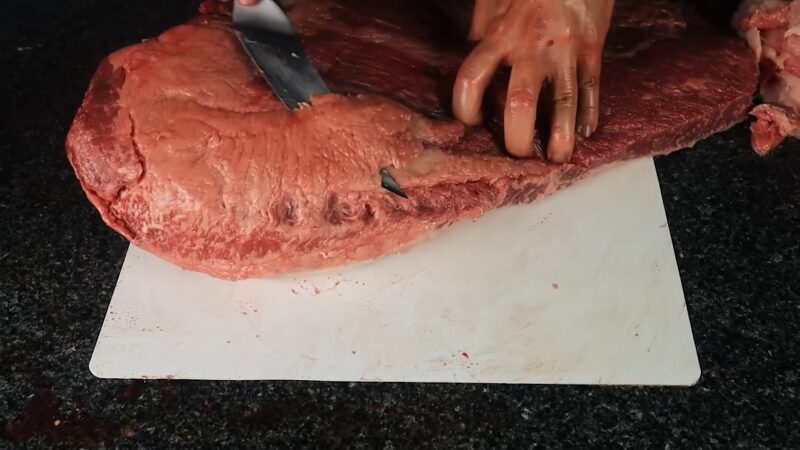
First of all, for trimming your brisket you will need a sharp knife, otherwise the preparation will be a mess. Armed with a dull knife and overconfidence, I ended up with a chop that looked like it had been through a minor surgery performed by a blindfolded surgeon. It was a massacre. Trimming the meat is about finesse, not force.
Also, as I mentioned above, I was removing all the fat, everything white I could see, thinking that it was good for my brisket. Over time, and after numerous YouTube tutorials and a few accidental stabbings (of the meat, not myself), I understood that leaving just the right amount of fat is crucial for flavor and moisture.
Seasoning
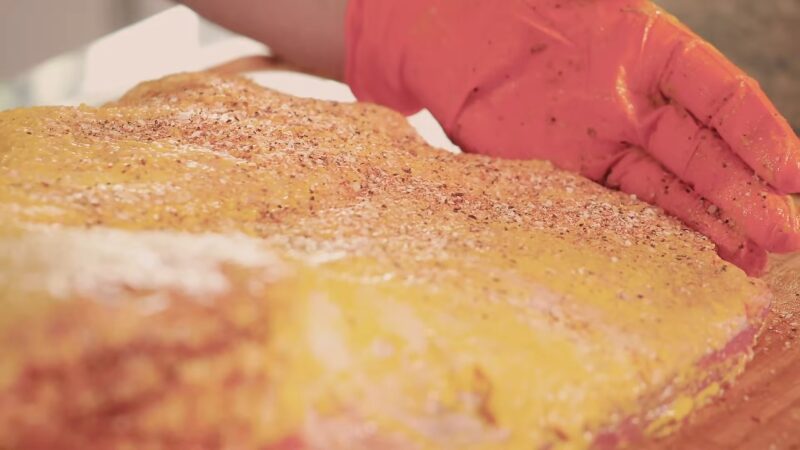
By watching too many “Salt Bae” videos, and how he sprinkles a kilo of salt over the steak I got a bit too excited and I overseasoned my first brisket. Later, I learned that a good brisket rub should complement the meat, not overwhelm it.
Eventually, I found my holy grail of seasoning – a simple yet effective combination of salt, pepper, and a few spices that you should use according to your taste. I prefer using Jamaican Jerk seasoning.
Marinating
Then came the marinating phase, where I mistakenly believed that if a little time in the marinade was good, then overnight must be divine. I was wrong.
Later through exploring and trying different methods, I discovered that the cut, with its rich fat content and robust texture, doesn’t need a long marinating time. A simple rub and the smoke would do most of the heavy lifting, infusing the meat with all the flavor it needed.
Equipment and Tools: Find a Perfect Smoker For You
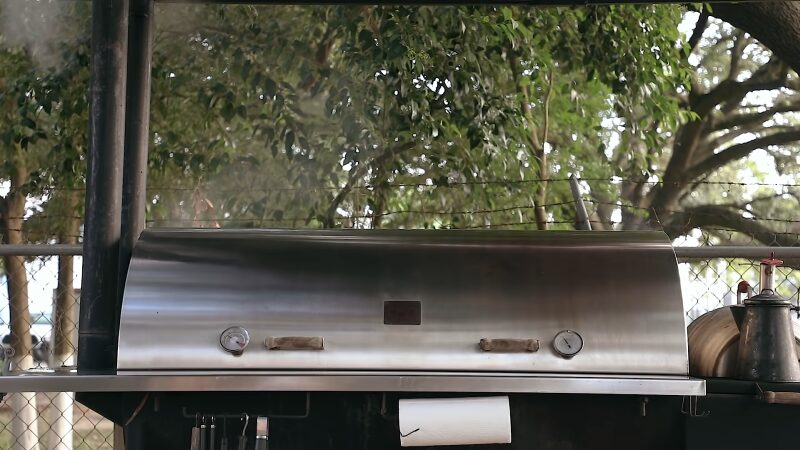
A good smoker is essential for your perfectly done brisket. I tried different options, and I will explain in detail what works for me and what does not, so you can understand which smoker is the best fit for you.
I started with a basic charcoal smoker. My first smoking began with a basic, no-frills charcoal smoker. I found it hard to manage heat and smoke.
While it taught me patience and the importance of maintaining a consistent temperature, its limitations soon became apparent. The uneven heat distribution and the constant battle to keep the temperature steady during long smokes were challenges, so I don’t recommend it unless you barbecue once a year and it isn’t that important to you.
After, I transitioned to a pellet smoker, and the game changed. It is loved by the smoking community for its reliability and precision. The pellet smoker, allowed me to maintain a consistent temperature with far less babysitting than the charcoal smoker demanded.
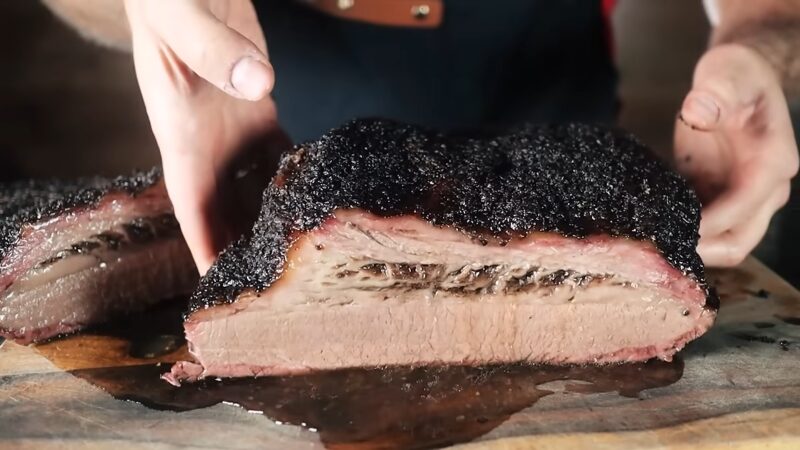
Its digital controls and automatic pellet feeding system made long smoking sessions more enjoyable. The even heat distribution and the ability to easily adjust smoke levels produced consistently better results with a beautiful smoke ring and a tender, flavorful crust.
So, I highly recommend going for the Pellet Smoker if you have ambitions of preparing a good barbecue.
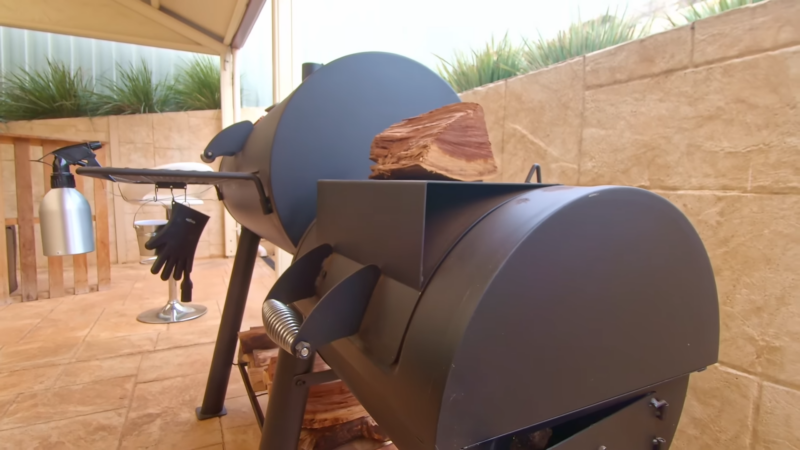
Also, I experimented with the offset smoker. It’s a big, heavy smoker that serious BBQ fans love because it gives you a lot of control over how you smoke your meat. I had to learn how to handle the firebox, adjust the airflow right, and get the hang of cooking the meat slowly and gently using wood logs. It was a lot of work but rewarding.
The offset smoker needed more time and effort, but the barbecue cut I made with it tasted amazing. It had a rich, smoky flavor I hadn’t managed to get with other smokers.
So, if you want to cook like a pro with some additional effort, an offset smoker is a good option.
Each smoker and tool has taught me something valuable about the art of brisket smoking. The charcoal smoker introduced me to the fundamentals; the pellet smoker taught me the importance of temperature control and consistency; the offset smoker deepened my appreciation for the craft and the flavors that can be achieved with wood smoke.
Some Barbecue Tools I Like to Use
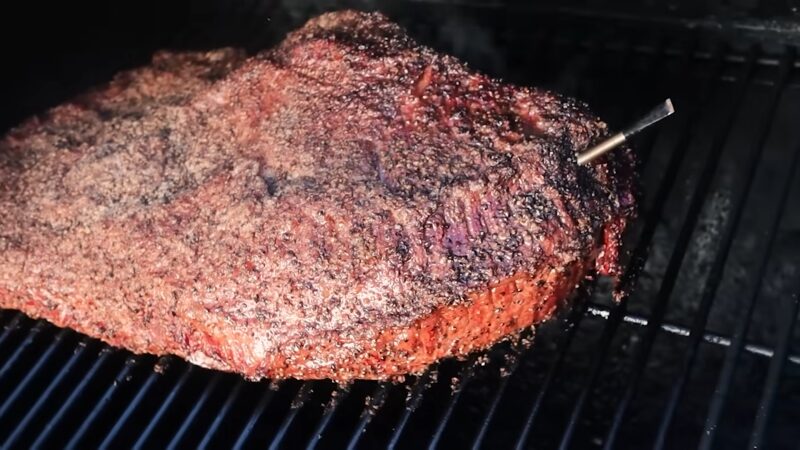
Alongside the evolution of smokers, my collection of barbecue tools grew. A good meat thermometer became my trusted companion, ensuring that I cooked the meat to the perfect internal temperature without having to guess.
High-quality knives for trimming and slicing the meat became invaluable, as did a sturdy set of tongs and a reliable meat injector for those times when I wanted to infuse extra flavor.
Let’s Move to The Main Part – The Smoking Process
My initial smoking method was rudimentary at best. I would load up the smoker with charcoal, throw on some wood chips I had on hand (without much thought to their flavor profile), and set the meat in the smoker with a hopeful heart.
My temperature control strategy was non-existent. The smoker’s temperature would swing wildly, soaring to the high heavens before plummeting down to the inadequacy. The result of these early attempts was brisket that ranged from “somewhat edible” to “charcoal briquette.” I knew I needed a change.
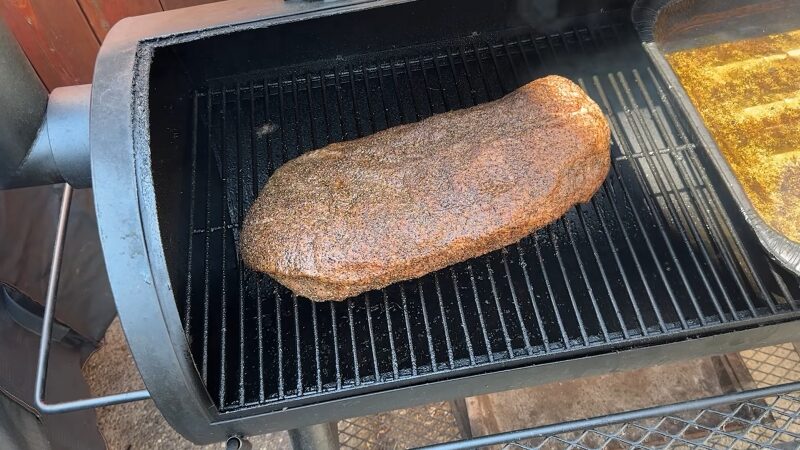
- Choosing the right wood – I realized the importance of choosing the right wood for smoking. I experimented with various types, moving from the heavy-handed mesquite, which can overpower the meat if not used sparingly, to the milder hickory and fruit woods like apple and cherry, which provided a subtler, sweeter smoke flavor. Each type of wood brought its character to the barbecue cut, and I began to blend different woods to achieve the perfect balance of smoke and flavor.
- Controlling the temperature became my next great challenge. Through trial and error, I learned the value of maintaining a consistent low and slow cooking temperature, typically around 225-250°F. This required constant vigilance in the early days, adjusting vents and adding fuel to maintain the sweet spot. It was a labor of love (and sometimes frustration), but the pursuit of perfection kept me going.
- Adjusting Techniques – Over time, my technique evolved. I invested in a digital thermometer with multiple probes, allowing me to monitor the smoker’s internal temperature and the brisket’s internal temperature simultaneously. This tool was a game-changer, giving me the data I needed to make informed adjustments on the fly.
- Managing the fire – Learning to create a more stable and consistent heat source by carefully selecting and preparing my fuel. I started using a mix of charcoal for heat and wood for flavor, arranging them in a way that provided a more even and predictable burn.
- Cooking time – I embraced the “it’s done when it’s done” philosophy, understanding that each brisket is unique and the perfect tenderness cannot be rushed. This meant sometimes smoking for upwards of 12-16 hours, depending on the size and characteristics of the chop. Understanding the ideal duration to smoke brisket per pound became my guiding principle, ensuring a consistently delicious result with every cook.
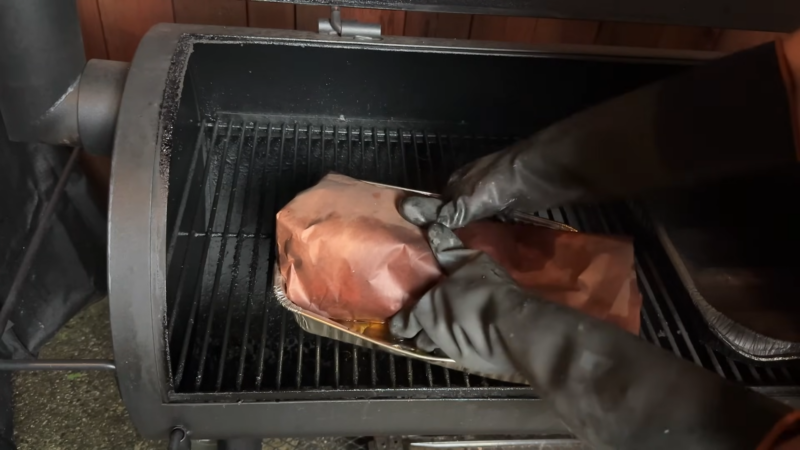
To Wrap or Not To Wrap?
I loved the idea of meat and smoke in their simplest form, mingling without barriers. My early attempts at smoking brisket this way resulted in a beautiful bark, that coveted a crusty exterior.
However, I couldn’t ignore the whispers in the smoking community about the benefits of wrapping. Advocates claimed that wrapping the brisket in foil or butcher paper could lock in moisture, prevent overcooking, and even speed up the cooking process. So, I had to try it out.
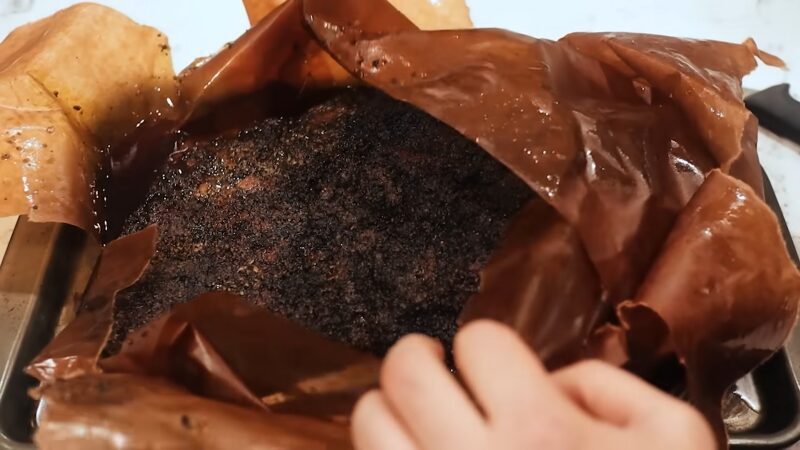
My first brisk wrapping involved aluminum foil. I wrapped the meat when it hit the stall, where the meat seemed to stop cooking. The foil did indeed push the brisket past the stall, and the cooking time was noticeably shorter. The meat was tender and juicy, but to my dislike, the bark had softened under the foil. It was a trade-off that left me torn.
Not ready to give up, I tried butcher paper as my next experiment. Butcher paper was a compromise between the two worlds. It allowed the meat to continue taking on some smoke while protecting it from drying out. The result was more in line with what I was looking for a brisket that was moist and tender, while not as crusty as the unwrapped version, still held a satisfying texture and flavor.
Through these experiments, I’ve come to realize that the decision to wrap or not to wrap isn’t a matter of right or wrong; it’s about personal preference and the specific goals you have for your brisket.
Wrapping can offer a safety net for moisture and tenderness, while unwrapped smoking champions the bark and the purest smoke flavor. So it is really up to you, or you can try both and see which one works for you better.
Today, I make my decision based on factors like the type of smoker I’m using, the weather conditions, and how much time I have. Whether I wrap it or let it ride out the smoke naked, I know I’m going to be satisfied with the outcome knowing the essentials for cooking a perfect brisket.
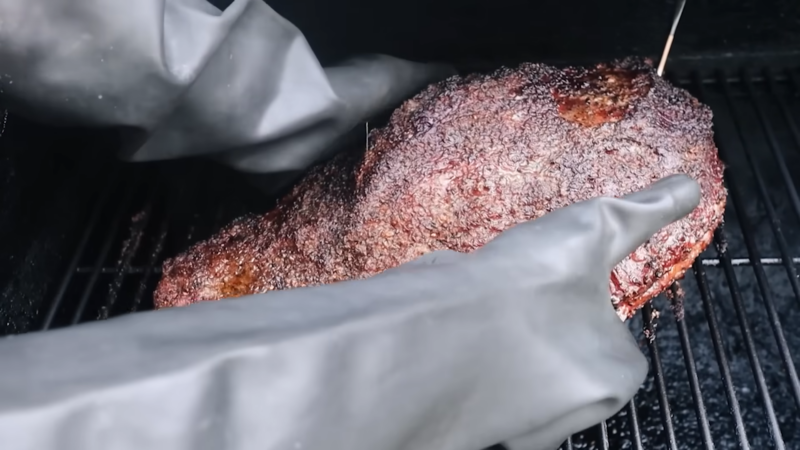
Don’t Forget to Rest the Brisket!
In my early days of brisket smoking, I underestimated the power of patience. I was so eager to slice into that smoky, aromatic masterpiece that I often rushed this process, not realizing I was sabotaging my own efforts. Resting the meat is an important final touch, no matter how much you are hungry and you want to eat it in one bite!
I learned through talking to more experienced pitmasters that I overlooked the importance of letting the meat rest after it comes off the smoker.
So I decided to correct my mistake. After removing the brisket from the smoker, I began to wrap it in butcher paper and then in a towel, placing it in a cooler to rest. This insulation kept the brisket warm while allowing it to reabsorb its juices, which would otherwise have ended up on the cutting board.
The difference was huge. The meat wasn’t just soft; it was juicy, with every slice shiny with moisture that had spread through the brisket. The flavors were stronger like the meat used the extra time to soak up and boost its smoky, tasty flavors.
I experimented with different resting times, from one hour up to four, finding that the sweet spot for my briskets tended to be around two to three hours. This period allowed the chop to cool down gently, stopping the cooking process while continuing to tenderize the meat.
7 Lessons Learned and Tips for Beginners
Reflecting on my failures and successes in smoking a perfect brisket, I’ve learned a lot of lessons, which can help you save time and make perfect meat on your first attempt. Here’s a summary of those insights, paired with advice for beginners who want to step into the smoking adventures.
1. Start with Quality
The foundation of a great brisket is the meat itself. Look for the best quality you can afford, ideally a Prime grade with good marbling. This fat marbling is crucial as it melts during cooking, naturally basting the meat and contributing to its flavor and tenderness.
2. Respect the Preparation Work
Don’t rush the preparation phase. Learn to trim the chop properly, leaving about a quarter inch of the fat cap to keep the meat moist during smoking. Apply your rub evenly, covering every nook and cranny to ensure a flavorful bark forms. Let the brisket sit at room temperature for a bit before smoking to promote even cooking.
3. Have Control Over the Temperature
Maintaining a consistent smoking temperature (usually between 225-250°F) is key. When considering electric smoker vs. wood smoker, note that while electric models offer precise temperature control, traditional wood smokers provide a unique flavor profile.
Invest in a reliable thermometer to keep a close eye on both the smoker’s temperature and the internal temperature of the brisket. Fluctuations in heat are one of the biggest obstacles to a perfect chop, so learn to adjust your smoker’s airflow and fuel to keep things steady.
4. Patience Is Non-Negotiable
Brisket smoking is not a quick process. Be prepared for the cooking to take anywhere from 12 to 18 hours, depending on the size of your meat and the consistency of your smoker’s temperature. It is ready when it reaches an internal temperature of around 195-203°F and feels tender to the probe, not necessarily when you want it to be done.
5. Let It Rest
Once off the smoker, it should rest for at least an hour, though longer is often better. This allows the juices to redistribute throughout the meat, ensuring that your brisket is moist and tender when it’s finally time to slice.
6. Smoke and Spice in Harmony
While it’s tempting to go heavy on the smoke or the spice rub, remember that balance is key. Aim for a smoke level that complements the meat’s natural flavors, and choose a rub that enhances rather than overwhelms.
7. Practice and Persistence
Your first smoking experience might not be perfect, and that’s okay. Smoking brisket is as much about the journey as it is about the destination. Each brisket you smoke will teach you something new, so keep at it.
To Conclude
Focus on mastering the basics: a simple salt and pepper rub, maintaining a consistent temperature, and learning to read the meat’s cues for doneness. Remember, every pitmaster started somewhere, and with each brisket you smoke, you’ll gain new experience.
Use mistakes as learning opportunities, and don’t be afraid to ask for advice from more experienced smokers. The art of smoking brisket is a rewarding experience, and mastering this technique as I did, will give you an enormous dose of satisfaction.
Above all, enjoy the process.
I’m Jamie Omalley. On my blog, you’ll find BBQ recipes and cooking tips to help you make great food at home. Stick around for simple steps and secret ingredients that will help you enjoy grilling delicious food all the time.